Introduction to GitOps
GitOps uses Git as the single source of truth for defining and managing infrastructure. Over the past few years, it has gained popularity for its ability to simplify and streamline deployments. Argo CD, a powerful continuous delivery tool for Kubernetes, has emerged as a leader in the GitOps space, enabling teams to manage application deployments with ease and precision.
As organizations grow, so does the need for secure and scalable authentication mechanisms. This is where Single Sign-On (SSO) comes into play. Integrating SSO with your GitOps workflow, specifically with Argo CD, can enhance security, streamline user access, and improve efficiency. In this blog, we'll explore the concepts of SAML and SSO, discuss why SSO is essential, and provide a step-by-step guide to implementing SSO in Argo CD using Azure Entra ID (formerly Azure AD).
What is SSO?
Single Sign-On (SSO) is a session and user authentication service that permits a user to use one set of login credentials (e.g., name and password) to access multiple applications. This process simplifies the user experience by reducing the number of times users need to log in and improves security by minimizing the number of places where credentials are stored or entered.
What is SAML?
SAML (Security Assertion Markup Language) is an open standard for exchanging authentication and authorization data between parties, specifically between an identity provider (IdP) and a service provider (SP). It allows for secure and seamless user authentication across different domains.
Why do we need SSO?
Implementing SSO is crucial for several reasons:
- Reduced Password errors: Users no longer need to remember multiple passwords, reducing the risk of weak or reused passwords.
- Centralized Control: IT administrators can manage user access and permissions from a single location, ensuring consistency and compliance.
- Improved Security: By reducing the number of login attempts, SSO minimizes the attack surface for credential-based attacks.
- Enhanced User Experience: Users can access multiple applications seamlessly, improving their overall experience and productivity.
Step-by-step guide (example using Entra ID)
Step 1: Configure a New Entra ID Enterprise App
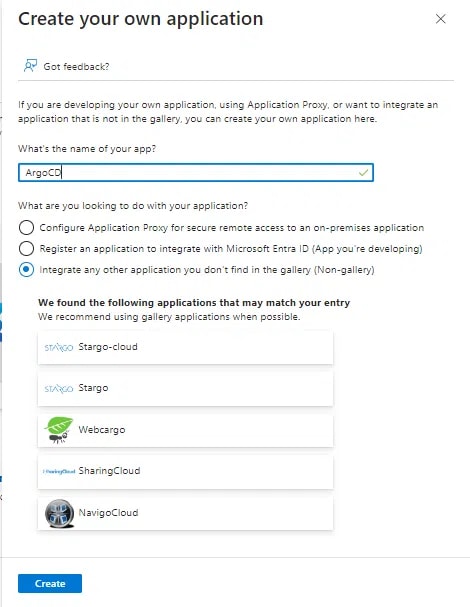
Create an Application in Entra ID
- Log in to your Entra ID portal.
- Navigate to "Enterprise applications" and choose "+ New application."
- Select "Non-gallery application."
- Enter a Name for the application (e.g., Argo CD), then choose "Add."
Configure Basic SAML Settings
- Once the application is created, open it from the Enterprise applications menu.
- From the "Single sign-on" menu, edit the Basic SAML Configuration section as follows (replacing
<argo-cd-url\with your Argo URL for eg:http://localhost:8080)- Identifier (Entity ID):
https://<argo-cd-url>/api/dex/callback - Reply URL (Assertion Consumer Service URL):
https://<argo-cd-url>/api/dex/callback - Sign on URL:
https://<argo-cd-url>/auth/login - Relay State: (leave empty)
- Logout Url: (leave empty)
- Identifier (Entity ID):

Configure user attributes and claims
-
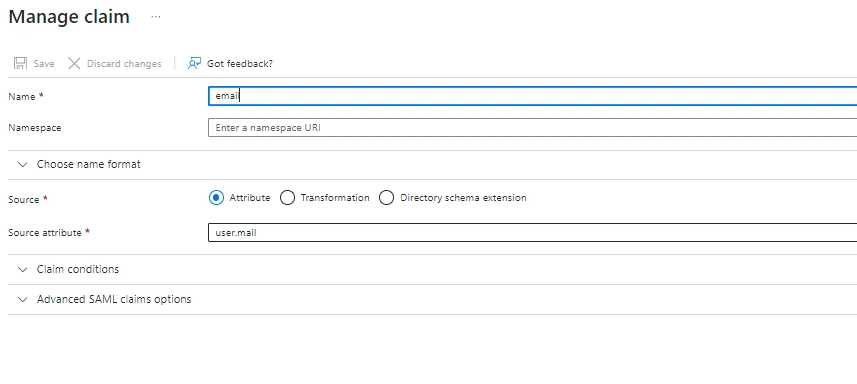
From the "Single sign-on" menu, edit the User Attributes & Claims section to create the following claims:
-
Add new claim:
- Name: email
- Source: Attribute
- Source attribute: user.mail
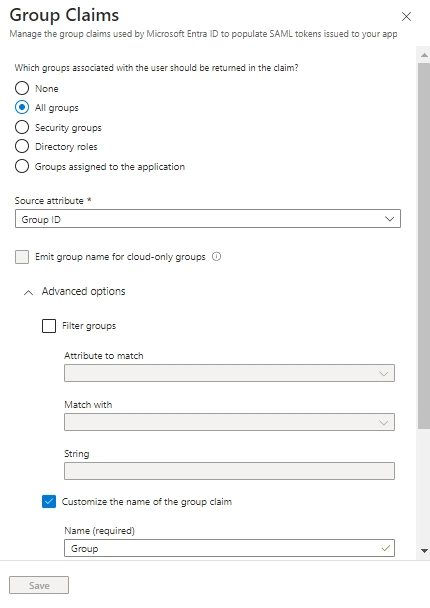
- Add group claim:
- Which groups: All groups
- Source attribute: Group ID
- Customize: True
- Name: Group
- Namespace: (leave empty)
- Emit groups as role claims: False
Download the SAML Signing Certificate
- From the "Single sign-on" menu, download the SAML Signing Certificate (Base64).
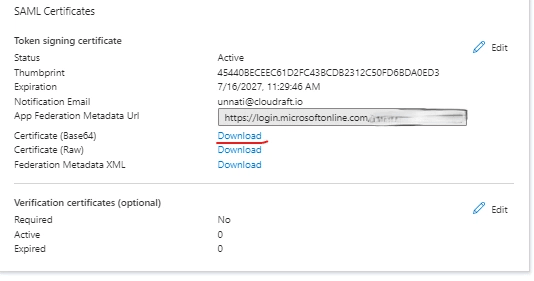
- Base64 encode the contents of the downloaded certificate file, for example:
$ cat Argo CD.cer | base64
bash- Keep a copy of the encoded output to be used in the next section.
Copy the Login URL
- From the "Single sign-on" menu, copy the Login URL parameter, to be used in the next section.

Step 2: Configure Argo CD to Use the New Entra ID Enterprise App
Edit Argo CD-cm ConfigMap
- Add the following dex.config to the data section, replacing the caData,
<argo-cd-url>, and<login-url>with your values from the Entra ID App. - In my case the argo-cd-url is
https://localhost:8080. - The Argo CD-cm.yaml file will look something like this:
apiVersion: v1
data:
  dex.config: |
    logger:
      level: debug
      format: json
    connectors:
    - type: saml
      id: saml
      name: saml
      config:
        entityIssuer: https://localhost:8080/api/dex/callback
        ssoURL: https://login.microsoftonline.com/48XXXXXXXX1/saml2
        caData: |
BASE64-ENCODED-CERTIFICATE-DATA
        redirectURI: https://localhost:8080/api/dex/callback
        usernameAttr: email
        emailAttr: email
        groupsAttr: Group
        groupDisplayNameAttribute: name
        groupDisplayNameFormat: {.name}
  url: https://localhost:8080
kind: ConfigMap
metadata:
  annotations:
    kubectl.kubernetes.io/last-applied-configuration: |
       {"apiVersion":"v1","kind":"ConfigMap","metadata":{"annotations":{},"labels":{"app.kubernetes.io/name":"Argo CD-cm","app.kubernetes.io/part-of":"Argo CD"},"name":"Argo CD-cm","namespace":"Argo CD"}}
  creationTimestamp: "2024-07-08T00:15:02Z"
  labels:
    app.kubernetes.io/name: argocd-cm
    app.kubernetes.io/part-of: argocd
  name: argocd-cm
  namespace: argocd
  resourceVersion: "2025170"
  uid: 368bc165-91f8-46ae-83f4-900b9101f256

yaml
Edit Argo CD-rbac-cm ConfigMap
- Configure permissions using Entra ID Group IDs for assigning roles.
- Here is an example of how your Argo CD-rbac-cm.yaml file should look like:
apiVersion: v1
data:
  policy.csv: |
    p, role:org-admin, applications, *, */*, allow
    p, role:org-admin, clusters, get, *, allow
    p, role:org-admin, repositories, get, *, allow
    p, role:org-admin, repositories, create, *, allow
    p, role:org-admin, repositories, update, *, allow
    p, role:org-admin, repositories, delete, *, allow
    g, "62f1be94-6eee-4d64-bc4c-fa5b0bac76cb", role:org-admin
  policy.default: role:readonly
kind: ConfigMap
metadata:
  annotations:
    kubectl.kubernetes.io/last-applied-configuration: |
      {"apiVersion":"v1","kind":"ConfigMap","metadata":{"annotations":{},"labels":{"app.kubernetes.io/name":"Argo CD-rbac-cm","app.kubernetes.io/part-of":"Argo CD"},"name":"Argo CD-rbac-cm","namespace":"Argo CD"}}
  creationTimestamp: '2024-07-08T00:15:02Z'
  labels:
    app.kubernetes.io/name: Argo CD-rbac-cm
    app.kubernetes.io/part-of: Argo CD
  name: Argo CD-rbac-cm
  namespace: Argo CD
  resourceVersion: '2014680'
  uid: dca1d187-ba8f-4eea-ad41-55923de13e11
yaml
Step 3: Test SSO
Access Argo CD
- Navigate to the Argo CD URL in your browser.
- Click the LOG IN VIA SAML button to log in with your Microsoft Entra ID account.
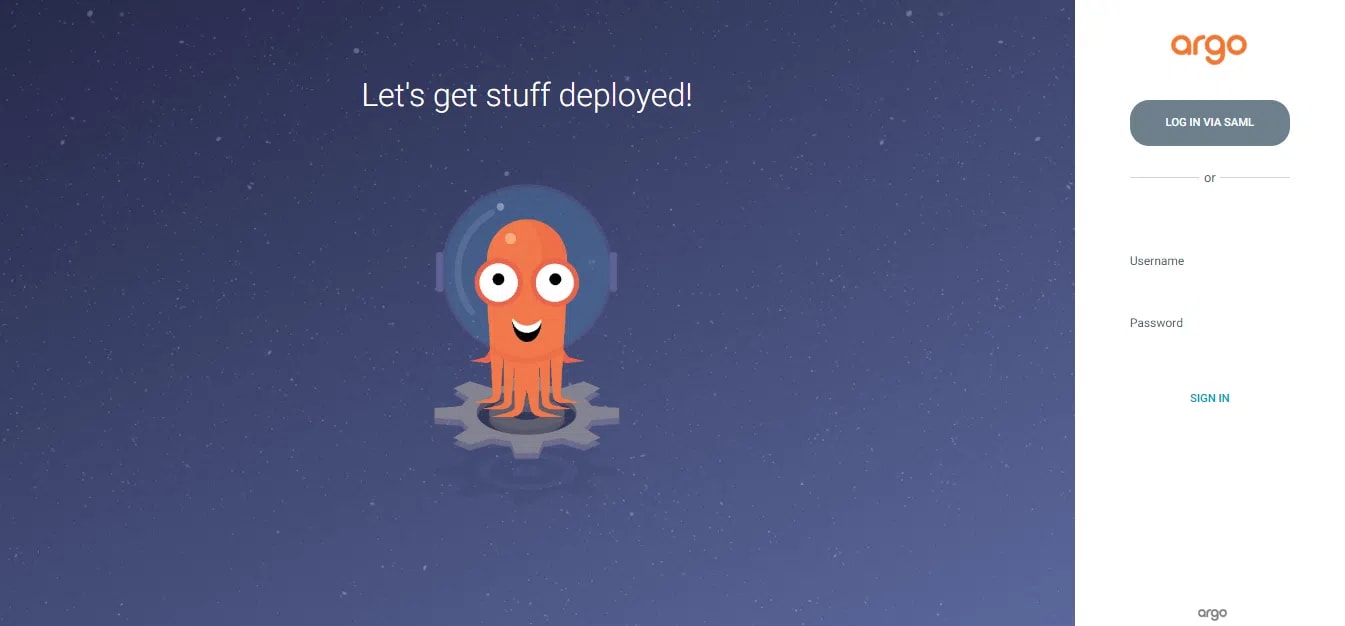
Enter your Entra ID credentials
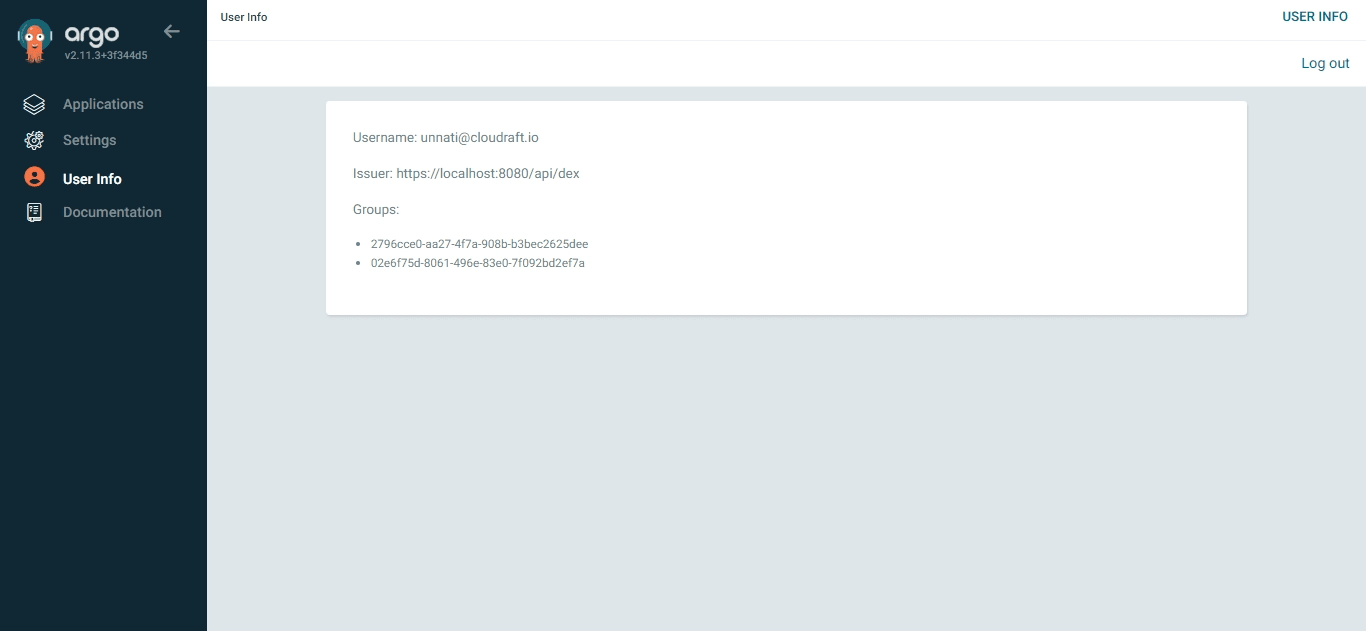
- Upon successful authentication, you should be redirected back to the Argo CD dashboard.
- You can also navigate to User Info and verify Group ID.
Conclusion
Implementing SSO with Argo CD using SAML is a straightforward process that offers numerous benefits, including enhanced security, improved user experience, and easier management. By following the step-by-step guide provided, you can seamlessly integrate SSO with Argo CD, leveraging the power of Entra ID. This not only simplifies access but also ensures that your DevOps workflows are secure and compliant.
Ready to elevate your Argo CD implementation?
Discover our Enterprise-level Support for Argo CD and Consulting Services. Let our experts help you optimize your GitOps workflow and enhance your deployment security.
